gpg --full-generate-key
gpg (GnuPG) 2.2.20; Copyright (C) 2020 Free Software Foundation, Inc.
This is free software: you are free to change and redistribute it.
There is NO WARRANTY, to the extent permitted by law.Tutorial
The instructions here describe the steps to generate a GPG key on Ubuntu 20.04. On the Ubuntu desktop, GPG is preinstalled. Detailed instructions for creating a key can be found in GitHub’s documentation.
-
Create a new key.
-
Press enter to accept the default key type,
RSA and RSA.Please select what kind of key you want: (1) RSA and RSA (default) (2) DSA and Elgamal (3) DSA (sign only) (4) RSA (sign only) (14) Existing key from card Your selection? -
Enter 4096 for the key size.
RSA keys may be between 1024 and 4096 bits long. What keysize do you want? (3072) 4096 Requested keysize is 4096 bits -
Press enter to accept the default for the length of time the key will be valid which is forever.
Please specify how long the key should be valid. 0 = key does not expire <n> = key expires in n days <n>w = key expires in n weeks <n>m = key expires in n months <n>y = key expires in n years Key is valid for? (0) -
Type Y and press enter again to confirm this.
Key does not expire at all Is this correct? (y/N) y -
Input the name to use for the key’s associated identity.
GnuPG needs to construct a user ID to identify your key. Real name: Ponder Stibbons -
Then just enter your commit email address.
Email address: ponder.stibbons@unseen.edu -
Add a comment if desired.
Comment: -
Confirm your identity information by typing O.
You selected this USER-ID: "Ponder Stibbons <ponder.stibbons@unseen.edu>" Change (N)ame, (C)omment, (E)mail or (O)kay/(Q)uit? O -
Enter a passphrase for your key in the [Passphrase Prompt].
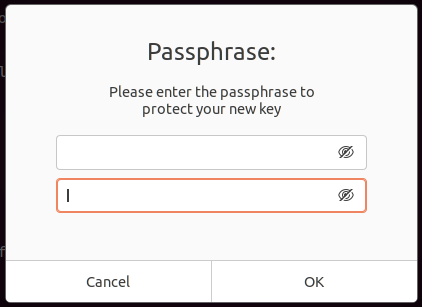 Passphrase Prompt
 -
This should output information similar to the following when your key has been successfully generated.
We need to generate a lot of random bytes. It is a good idea to perform
some other action (type on the keyboard, move the mouse, utilize the
disks) during the prime generation; this gives the random number
generator a better chance to gain enough entropy.
gpg: key 5DBCB56A458D5A0F marked as ultimately trusted
gpg: directory '/home/pstibbons/.gnupg/openpgp-revocs.d' created
gpg: revocation certificate stored as '/home/pstibbons/.gnupg/openpgp-revocs.d/00DD666179AF17FB2D5DF49B5DBCB56A458D5A0F.rev'
public and secret key created and signed.

pub   rsa4096 2020-10-27 [SC]
      00DD666179AF17FB2D5DF49B5DBCB56A458D5A0F
uid                      Ponder Stibbons <ponder.stibbons@unseen.edu>
sub   rsa4096 2020-10-27 [E]
|
If you have multiple secret keys and would like to use this key by default, set it as such in Of course, make sure to substitute the id specific to your key here. |
Conclusion
You now have your very own GPG key! Check out my post on how to Backup and Restore a GPG Key because you will want to make sure not to lose your new key!